Work in Progress

The Shire

Posted by dykio on 22 Apr 2021, 14:52

Hi guys,

Here we go again :-D

First a little lesson about the shire:

The Shire is described as a small but beautiful and fruitful land, beloved by its inhabitants. The Hobbits had an extensive agricultural system in the Shire, but did not proceed with industrialisation. Various supplies could be found in the Shire, including cereals, fruit, wood and pipe-weed (a favourite treat of Hobbits).

The Shire was quite densely populated in parts with many villages and a few towns, but it still was open enough to allow for wide forested areas and marshes. There were green, rolling hills and freshly tilled earth, along with gardens and flower boxes on window sills.


so... for those who have not yet fallen asleep during this lesson i will now continue with, tatatara tata :
Landscaping :drool:

Now dont expect to much beause this is what i have done so far:

I first started with 3 plates of 2cm thick polystyreen(?) the cheap isolation material. And these i placed according to my plan just to get an impression of how it would look.
Image

Next i made some templates for the roads and the small river and started playing around with that
Image

Then i cut the plates and glued them on a plate of mdf. This plate is 61x122 cm. This is the biggest size i'm allowed by the "boss". Now i could have taken the risk and even make it bigger but then i think she would made me sleep on it :-D
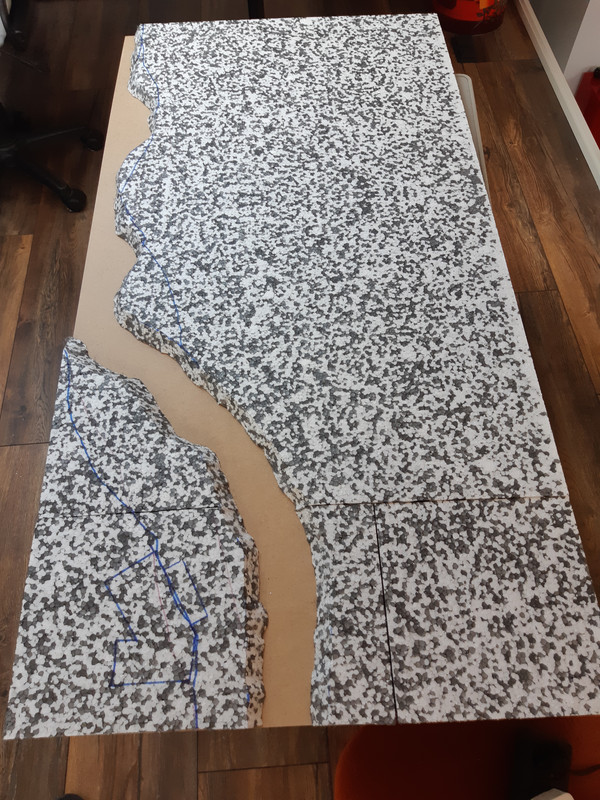
Image

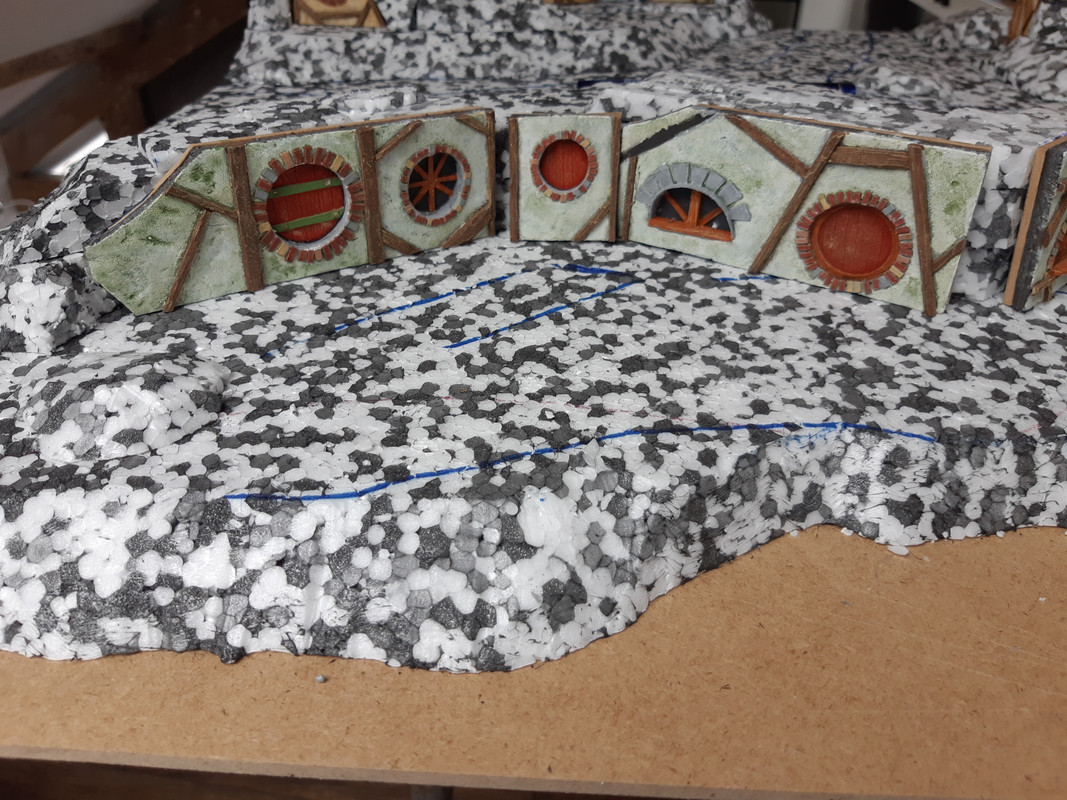
Then the front of the hobit holes came into the game. I played around with these and when i was ok with the place....
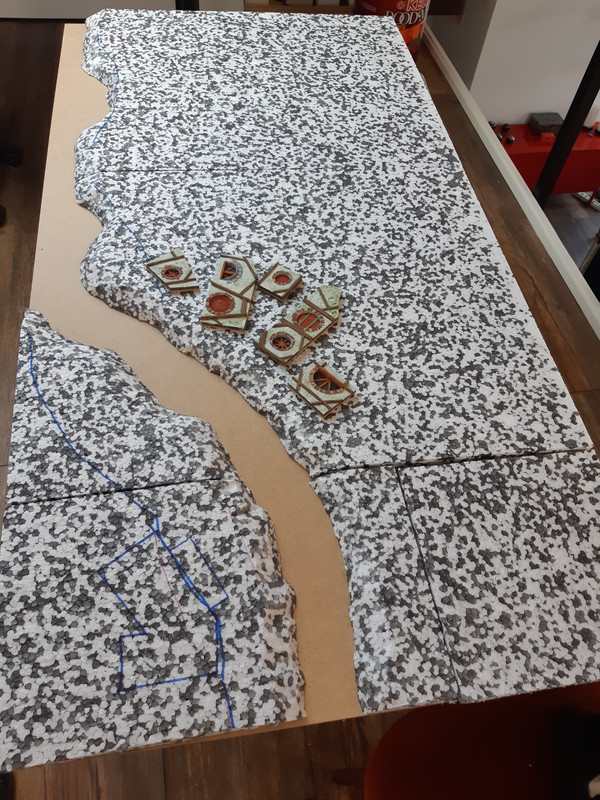
Image

I buld up another layre of ploystereen to get some height
Image

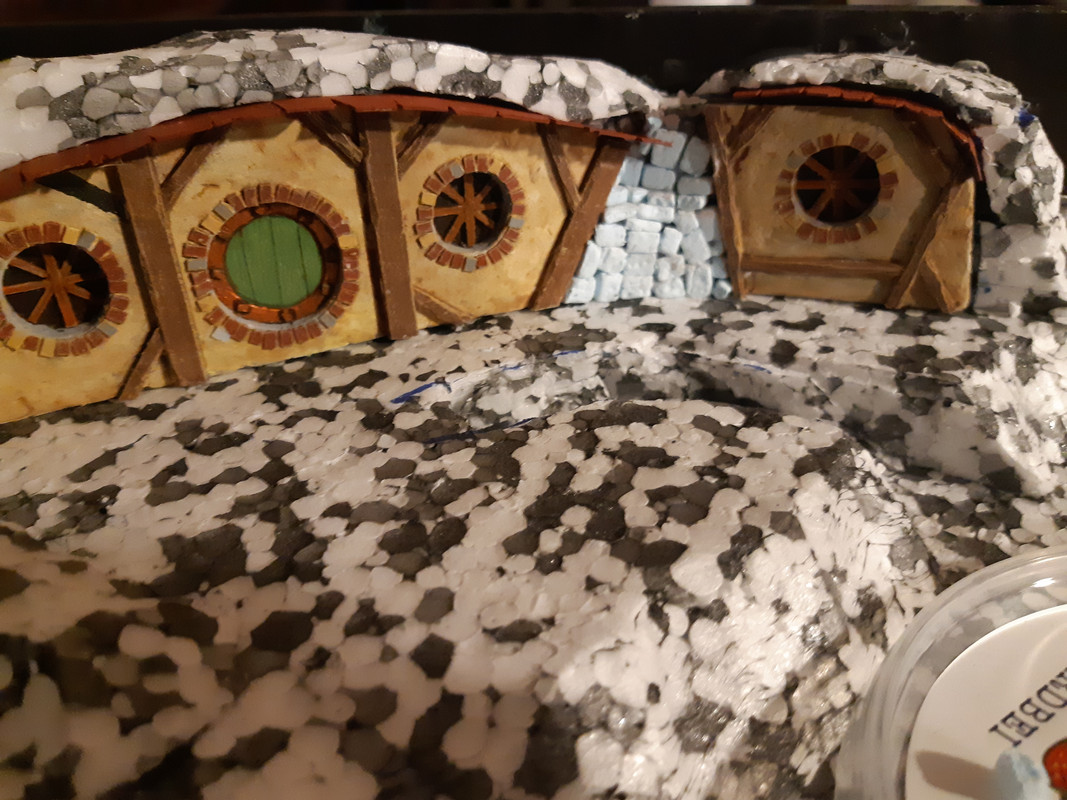
And put the hobbitholes in it.
Image

Thats it for now guys.

Laterrrrrrrrrrr
User avatar
dykio  Netherlands
 
Posts: 1503
Member since:
31 Jan 2008, 19:56


Posted by Peter on 22 Apr 2021, 16:08

Oh, what a pity we can't see you sleeping on that hobbit landscape! It would have been great fun......... for us! :mrgreen:

Looking good so far Dykio! Looking forward to the next steps of this wonderfull topic! ;-) :thumbup:

In the mean time: Image
User avatar
Peter  Belgium

Moderator Moderator
 
Posts: 22751
Member since:
25 Mar 2008, 18:51

Posted by dykio on 01 May 2021, 20:00

Hi Guys,

as the days rush by the work on the shire continues. I must say although the result isnt always what i was hoping for it is great fun to be busy with something like this.
Last time i was making the landscape and so next step was integrating the hobbit holes into the landscape and giving some detail to it.

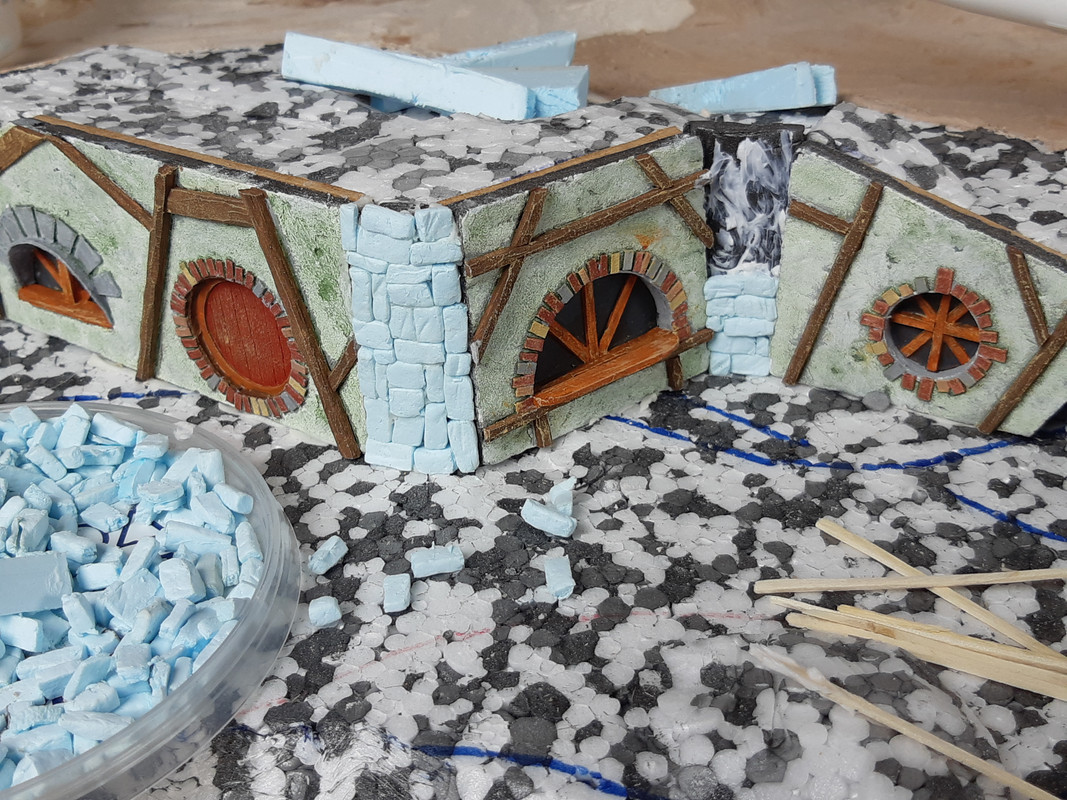
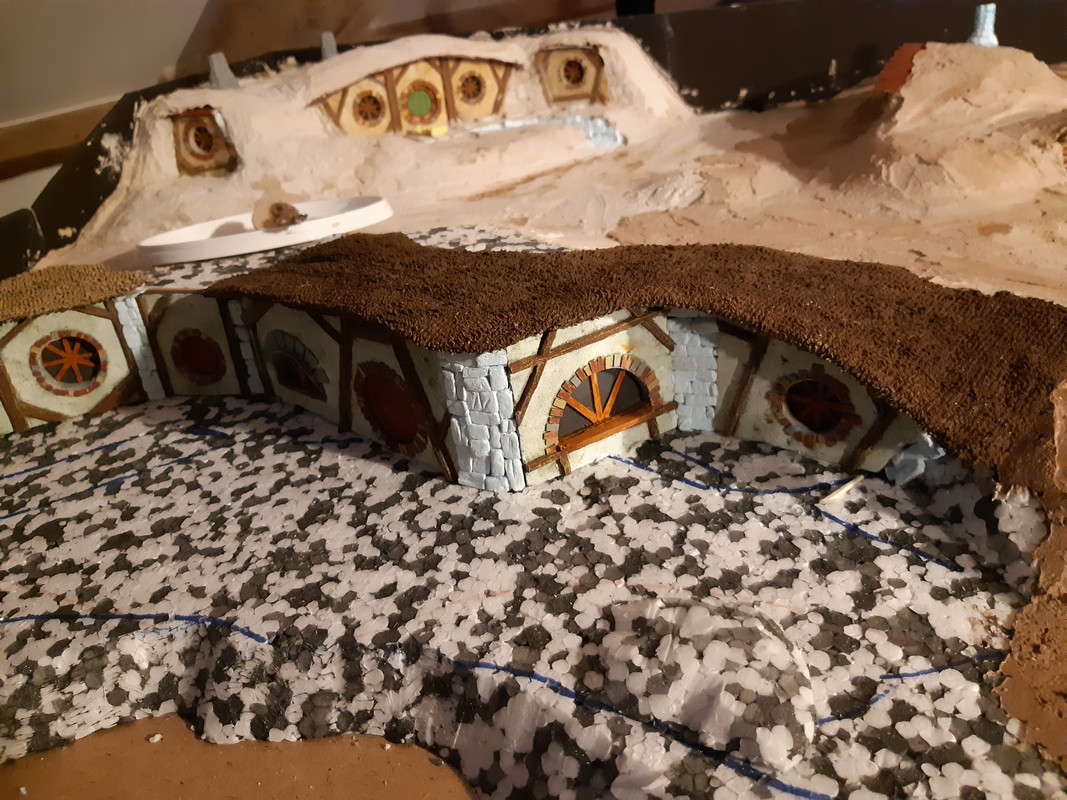
i had made loose components for the hobbitholes but that wasnt a great idea. After i placed them on the terrain there was "some" space left that had to be filled in. So i decided to do that with "self made stones"

As you can see on this picture (the blue ones :-D )
Image

Now i can hear you scream...please please tell us how you made these incredible stones. :shock:
Well dont worry i will tell you. Mind you this method wasn't stolen from the internet but i discovered it myself !!
Well... most of it...euh okay halve... well i did look it up myself so....yeah ok...i stole it :-D

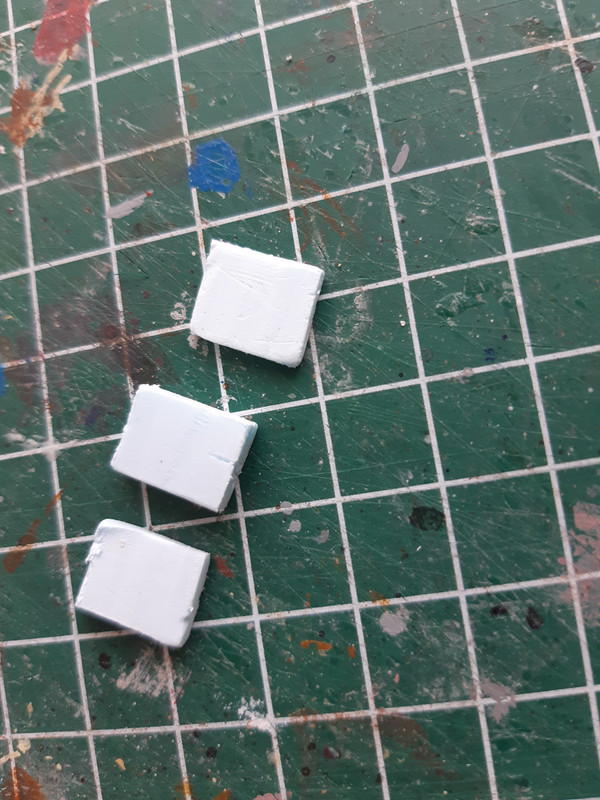
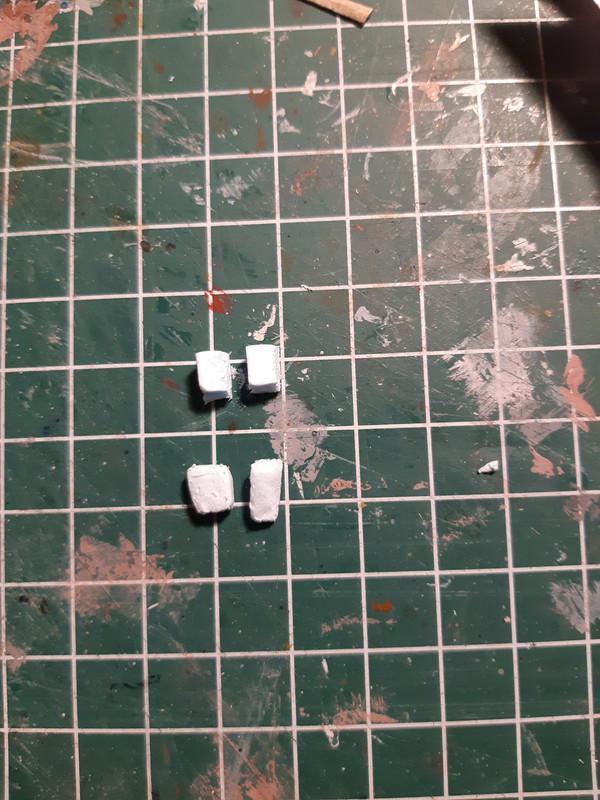
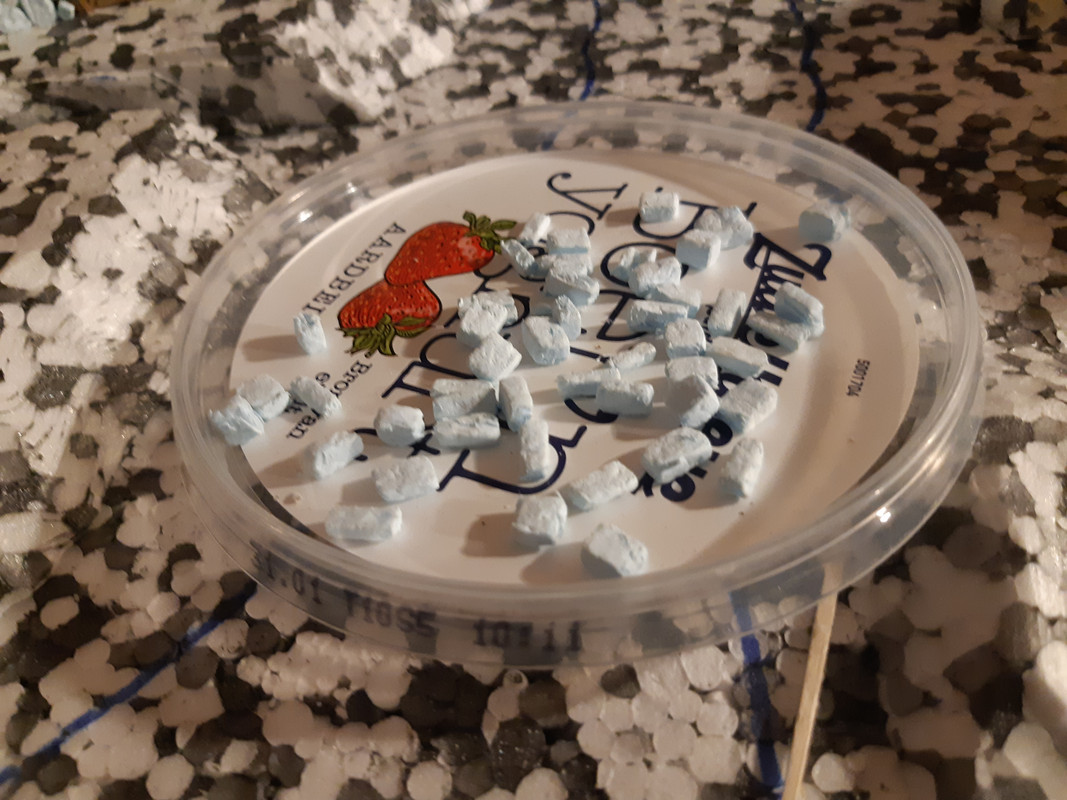
I have this blue (i know it looks white but it is blue) kind of foam and i cut it into very small pieces. Now this stuff was some kind of static so it sticked to everything exept to the plastic cup it should be in. But after peeling the small pieces from everwhere (and believe me i realy mean everywhere) i think they look nice.

first i cut small pieces
Image

then i put them in a cup and added some real stones..... heu? why???
Image

well, when you shake this (and put a lid on...) the smooth outside (top) changes to a more weathered look (bottem)
Image

and then this is the result
Image

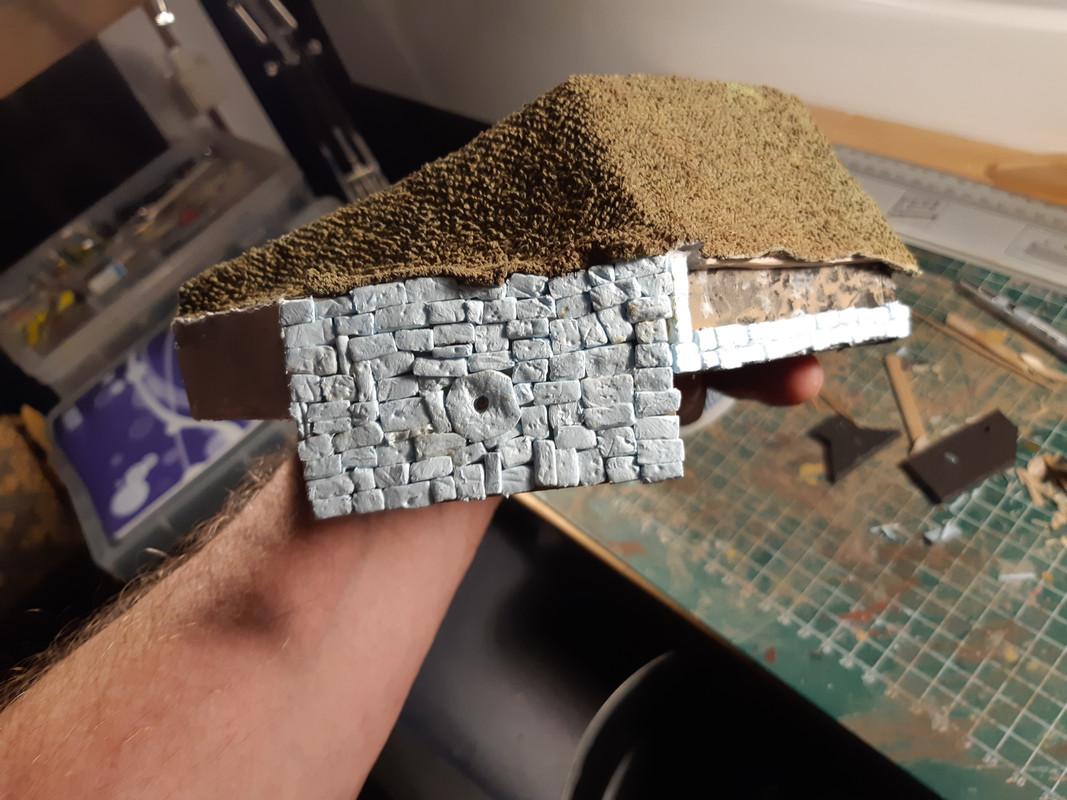
and with these you can make walls like these. Timeconsuming ? Yes ! Fun to do? Double Yes !!

Image

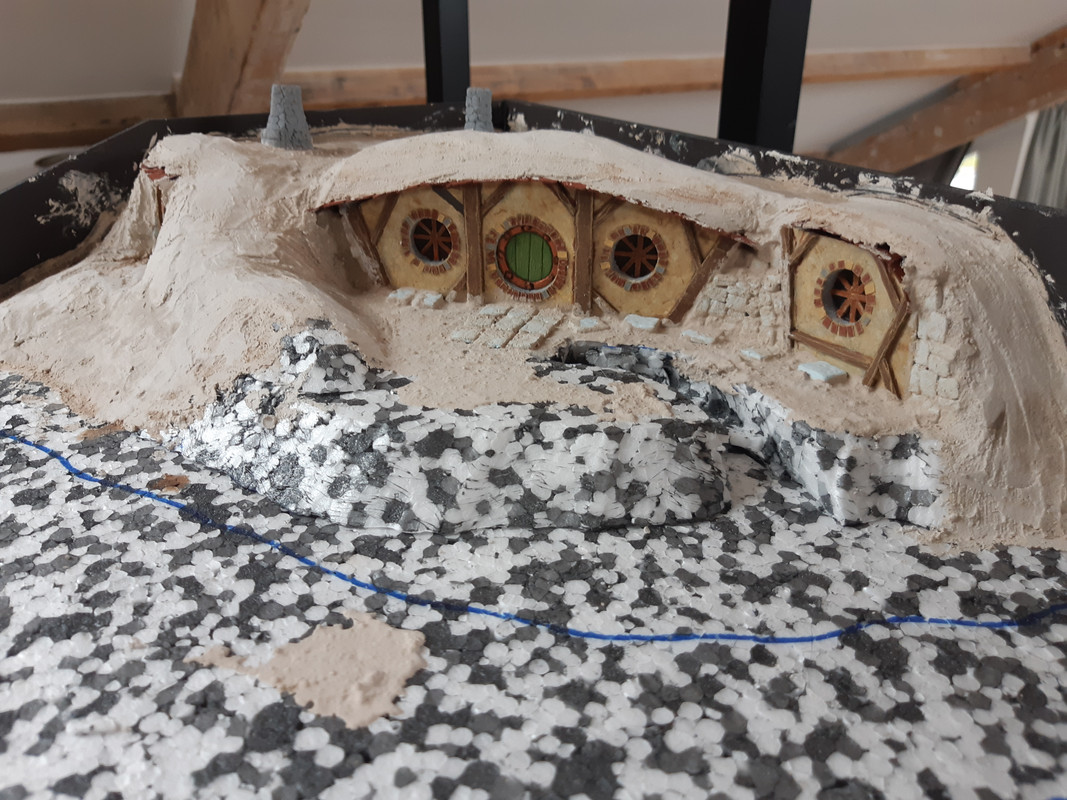
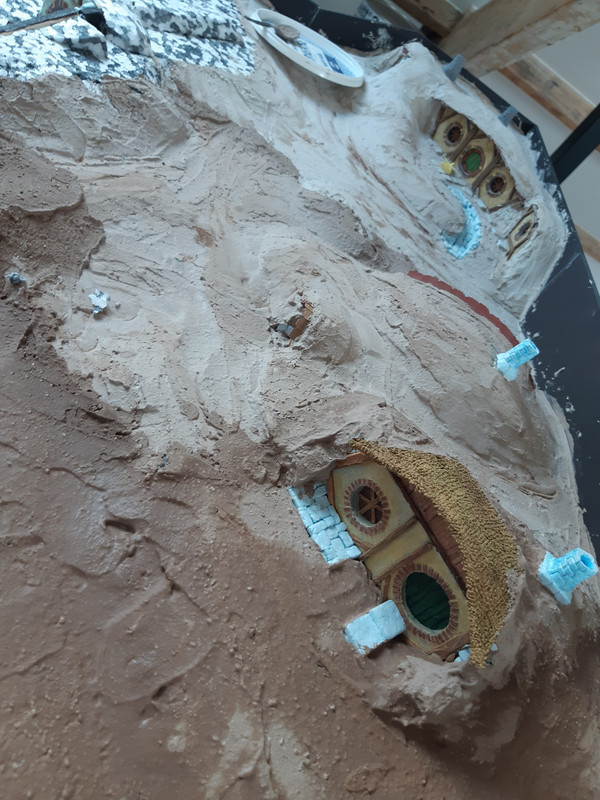
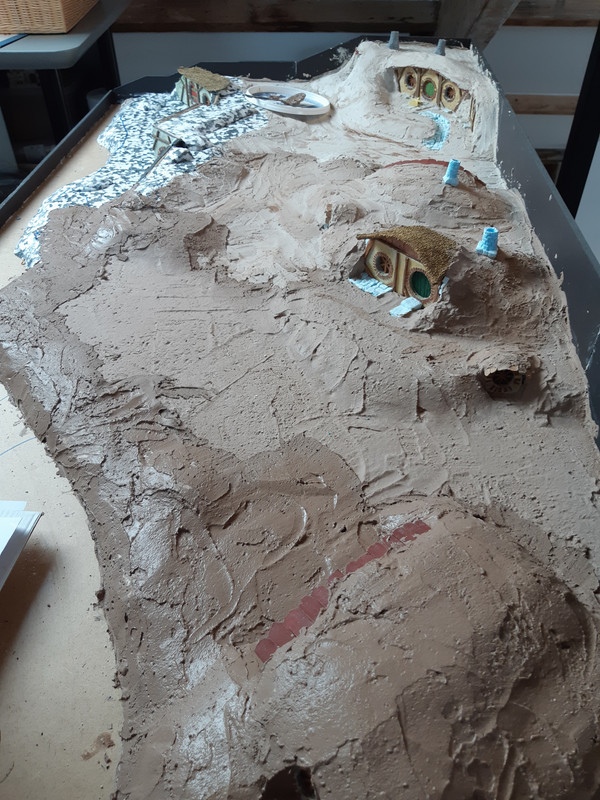
After building these walls i started putting a lair of plaster mixed with brown paint on ...well almost everything.

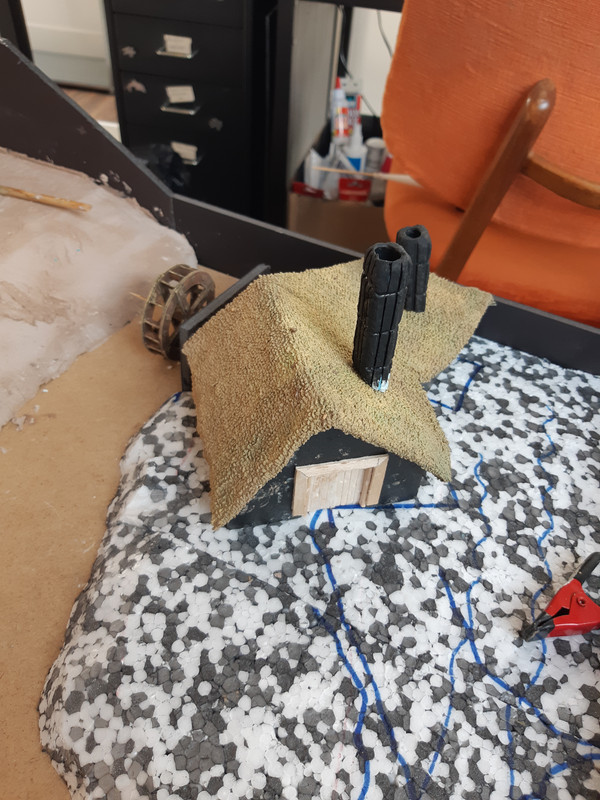
And so here we are now (ps the chimneys are made out of one piece)
Image

Image

Image

Image

At the moment with only the brown plaster on it i have to say that it looks more like mordor :-D so still loads of work to do :yeah:

thats it for now

hope you enjoy

Laterrrrrrrrrrrrrr


.
User avatar
dykio  Netherlands
 
Posts: 1503
Member since:
31 Jan 2008, 19:56

Posted by MABO on 02 May 2021, 06:26

Even if it looks more like Mordor, one can already hear the birds sing and the Hobbits laugh. The will be happy when their new homeland is ready. Thanks for the stone tutorial. When I saw the pictures I was screaming: Please please tell us how you made these incredible stones! :-D :yeah:
User avatar
MABO  Europe
Supporting Member (Gold) Supporting Member (Gold)
 
Posts: 9171
Member since:
12 May 2008, 18:01

Posted by Peter on 02 May 2021, 08:23

I must check forum rules if they say something about stealing. In the mean time "carry on"! :P

Seams to me that it all looks fine for now! It may look like Mordor, but as long that the Nazgül not appear I have no problems with it. ;-) :thumbup:
User avatar
Peter  Belgium

Moderator Moderator
 
Posts: 22751
Member since:
25 Mar 2008, 18:51

Posted by sberry on 02 May 2021, 09:58

This landscape already looks really beautiful and serene, I would like to spend my next holidays there...
And the trick with the stones to create stones is clever, thanks for sharing!
User avatar
sberry  Germany
 
Posts: 953
Member since:
12 Mar 2010, 20:37

Help keep the forum online!
or become a supporting member

Posted by dykio on 06 May 2021, 19:12

sberry wrote:This landscape already looks really beautiful and serene, I would like to spend my next holidays there...
And the trick with the stones to create stones is clever, thanks for sharing!


You are offcourse welcome! But if youre more then 1.50meter tall you better wear a helmet inside :-D
User avatar
dykio  Netherlands
 
Posts: 1503
Member since:
31 Jan 2008, 19:56

Posted by Beano Boy on 06 May 2021, 21:51

Hobbits have very large over sized feet, so very large welcome mats would be nice for each heel and big toe to smile upon.
This certainly is a nice sized adventure for me to trundle myself along. :coffee: Well done scratch builder. :thumbup: BB
Beano Boy  England
Supporting Member (Gold) Supporting Member (Gold)
 
Posts: 8121
Member since:
03 Sep 2013, 14:45

Posted by dykio on 10 May 2021, 09:33

Hi Guys,

While the rain is streaming pass the windows (yes spring has finally arrived) it is time to return to the shire for the next part.

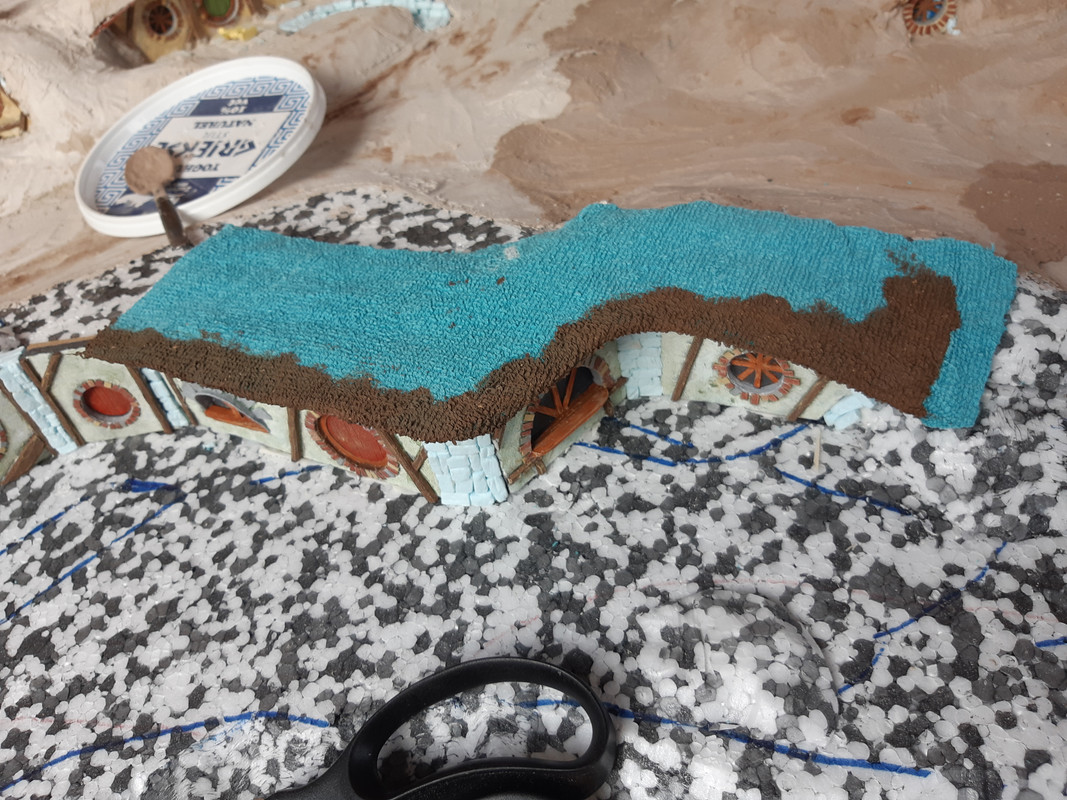
I didnt want al the housen to be in the hills but i also wanted to have some thatched roofs. For this i always use an old towel. How to get an old towel? Well, just by a new one and then wait untill i gets öld" :-D

The cut it into the desired shape
Image

Then glue it to some thick paper
Image

Do use enough glue and then wait until its dry
Image

after it dried i put it into place and then i realy soaked it in a mixture of water, white glue and brown paint. Because the towel absorbs everything you really have to use a lot. And then it has to dry again.
Image

Then it looks likes this
Image

This is offcourse way to dark but that will be better after the drybrushing:
Image

Laterrrrrrr
User avatar
dykio  Netherlands
 
Posts: 1503
Member since:
31 Jan 2008, 19:56

Posted by Ochoin on 10 May 2021, 10:24

sberry wrote:This landscape already looks really beautiful and serene, I would like to spend my next holidays there...
!


I'm assuming you mean in Matamata in New Zealand?

https://whereangiewanders.com/hobbiton- ... quet-tour/

donald
User avatar
Ochoin  Scotland
 
Posts: 2484
Member since:
16 Jan 2010, 04:00

Posted by PaulRPetri on 10 May 2021, 14:45

Incredible project!!
PaulRPetri  United States of America
 
Posts: 669
Member since:
02 Apr 2019, 00:59

Posted by dykio on 20 May 2021, 20:11

Hi Guys,

One of the first things you pass when you leave the highway to the shire is the watermill. So the next chapter is how this was build in the 1st era...or second....or... a couple of weeks ago :-D

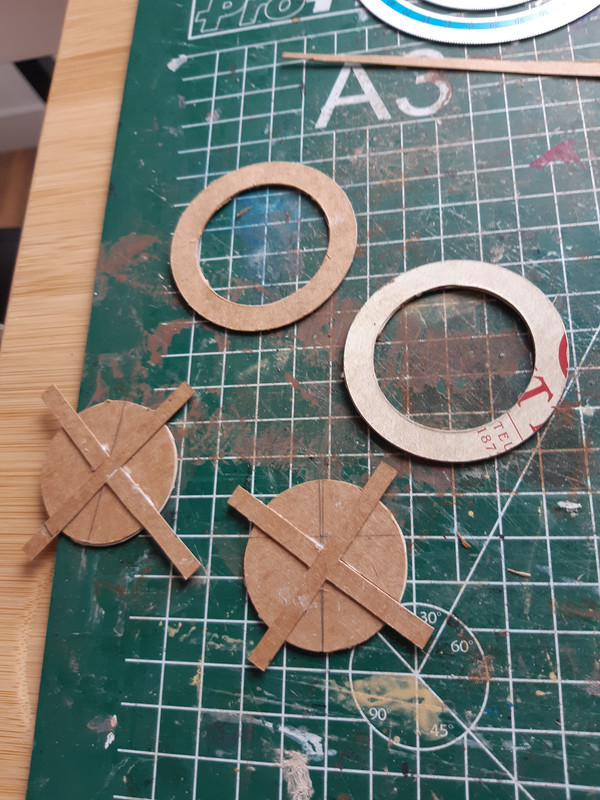
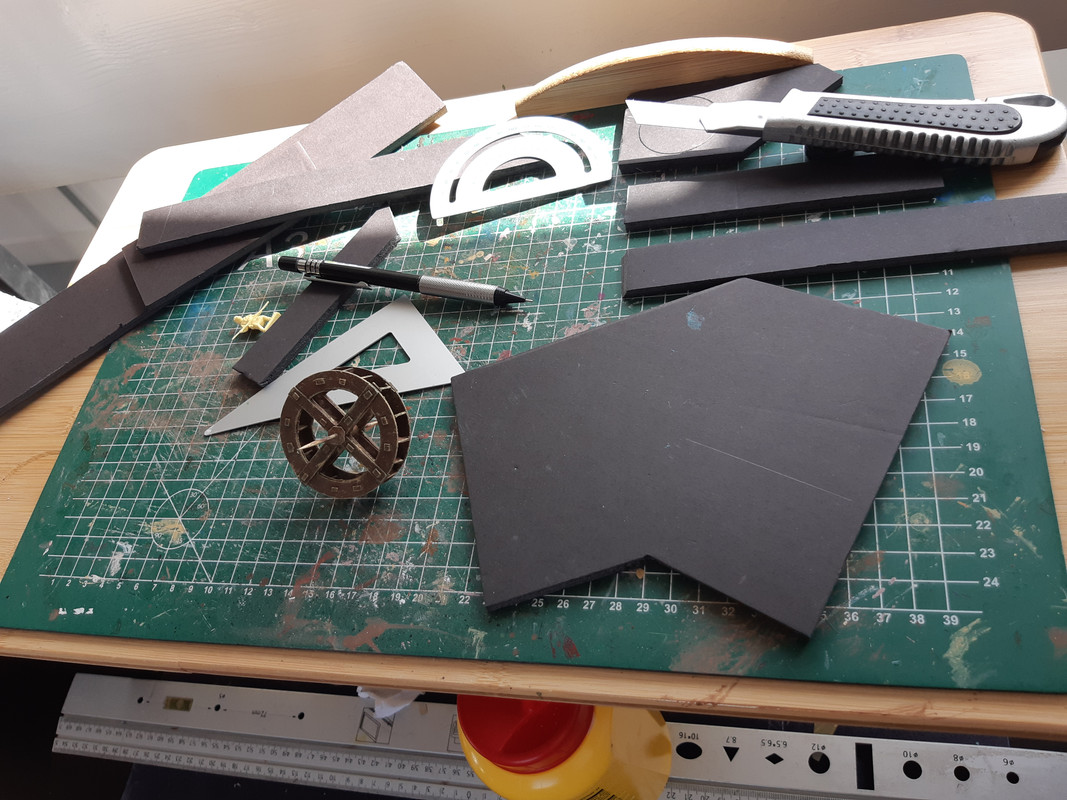
I started of by making the water-wheel. first some circles cut out of thick paper from a corn-flake box. As you can see i used an incedible expensive ( i think 1 euro) piece of equipment for this. The circle itself was very carefully measured out and was exactly the right size. Which was easy because being fantasy every size is the right size :-D

Image

Next step was making a sort of wheel

Image

Image

Then i glued it together with some smal pieces beween them. A cocktail stick was put in the middle and then it was painted and drybushed etc.

Image

Then the mill itself was built.

I made the walls again from foamboard and the roof from thick paper. I made a mixture of glue and paint and soaked a piece of towell in it.

Image

Image

this was then put on the roof and left to dry
Image

Then the details were made. As you can see the whole building is quite irregular wich according to my own idea fits more to hobbits then a clean and tidy building. i mean if you drink beer and smoke a pipe the hole day through....

Image

since i had some self made stones left i use them everywhere i can :-D

Image

Image

i think you can gues the next steppes by now...(grey basing, some coloured stones and some drybrushing)

Image

now as you might have noticed i made a complete wheel... and that wasnt to clever because a part of it is ofcourse under water...... so i had to cut a piece of.

Image

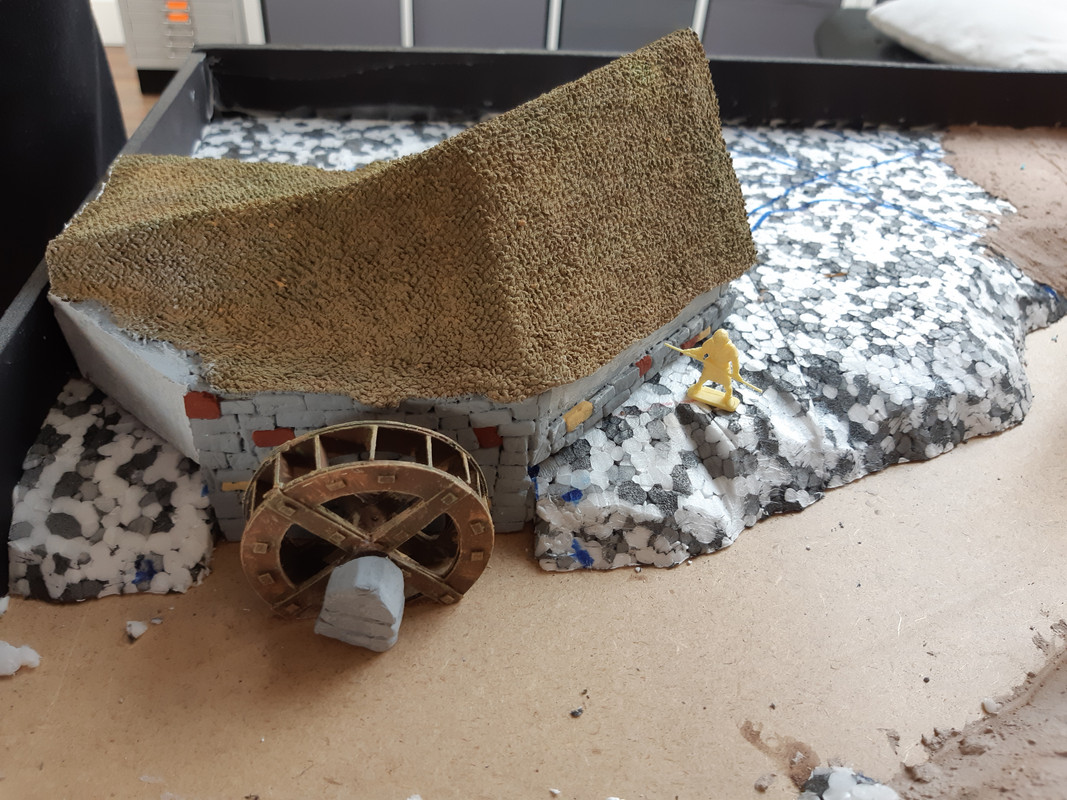
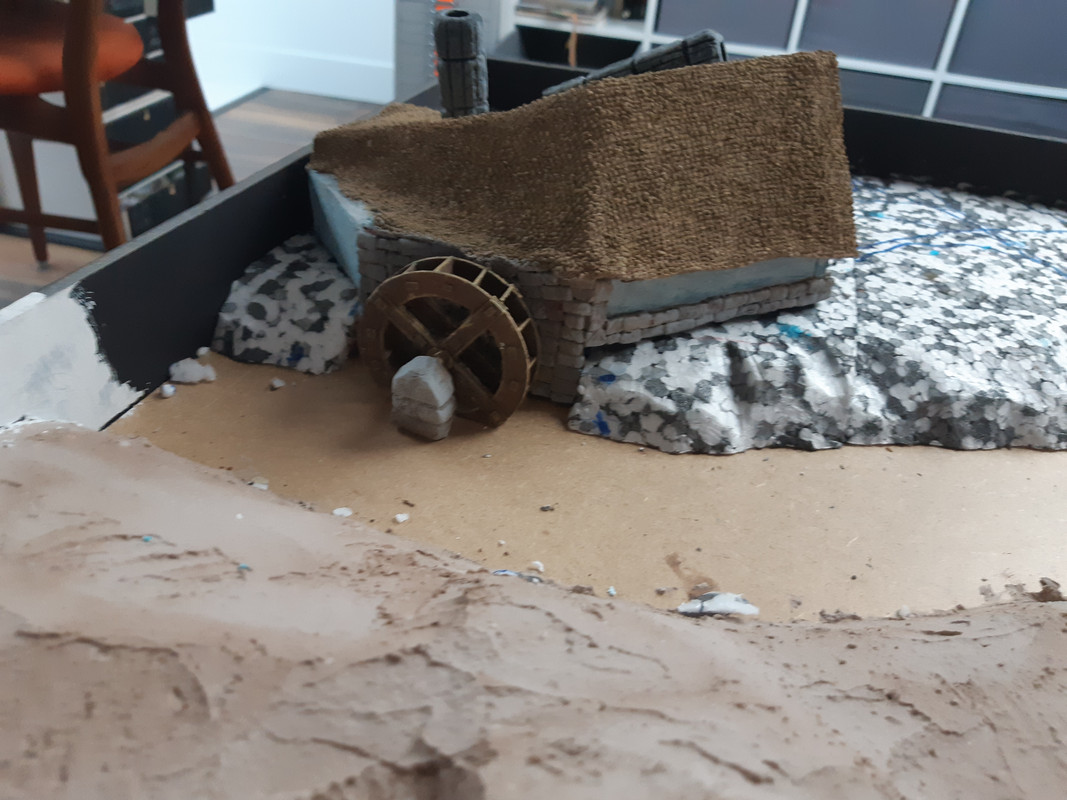
final steps weere painting the walls in a blue-ish colour and making the chimneys. So for now it looks like this
Image

Image

So this is hows things look now in the shire.

Image

Im not quite sure what im gonna do next but thats al part of the fun when youre going on an unexpected journey.....

laterrrrrrr
User avatar
dykio  Netherlands
 
Posts: 1503
Member since:
31 Jan 2008, 19:56

Posted by Peter on 20 May 2021, 20:25

Step by step your "Shire" is coming together. Nice watermill you made there! :thumbup:

Looking forward to what you will make next. ;-)
User avatar
Peter  Belgium

Moderator Moderator
 
Posts: 22751
Member since:
25 Mar 2008, 18:51

Posted by Pocho Azul on 21 May 2021, 00:03

This is looking great! Very much looking forward to future progress.
User avatar
Pocho Azul  United States of America
 
Posts: 72
Member since:
23 Jan 2021, 02:11

Posted by Egbert on 22 May 2021, 10:59

Your project looks amazing and it's moving fast... :-D
It will be a wonderful village for your Hobbits! :P
User avatar
Egbert  Germany
 
Posts: 602
Member since:
16 Oct 2008, 06:47

Posted by MABO on 22 May 2021, 18:20

Love to see the watermill!
User avatar
MABO  Europe
Supporting Member (Gold) Supporting Member (Gold)
 
Posts: 9171
Member since:
12 May 2008, 18:01

Help keep the forum online!
or become a supporting member

Posted by Minuteman on 22 May 2021, 19:39

This is all looking great. I am very familiar with JRR Tolkiens's pictures (drawn/painted by himself) of The Shire, and have actually seen the originals of these at an exhibition at the Bodleian Library a few years ago in Oxford, UK. What a great imagination he had, as well as quite considerable skills as an artist!

The Watermill etc will be a sight to see. Is your intention to populate The Shire, and if so will it be using the Airfix Robin Hood figures? Some are suitable, although those with beards will need a 'shave'...Hobbits have hairy feet but no beards!
User avatar
Minuteman  United Kingdom
 
Posts: 1141
Member since:
06 Mar 2020, 21:38

Posted by bothree69 on 24 May 2021, 06:42

what kind of miniatures will you use for the characters ???
have a good time
bothree69  Italy
 
Posts: 104
Member since:
19 Nov 2020, 10:41

Posted by Susofrick on 27 May 2021, 08:16

Great project! I am also curious what figures you will use as hobbits. I have some, but they are in 32mm.
User avatar
Susofrick  Sweden
Supporting Member (Gold) Supporting Member (Gold)
 
Posts: 7712
Member since:
19 Feb 2008, 12:10

Posted by sberry on 27 May 2021, 16:42

It's nice to see the progress. I especially like the watermill.
And I still cannot believe that I did not learn this fantastic towel method for creating thatched roofs earlier - it seems utterly clever to me. In the past, I always struggled with modeling clay; the next time I need a thatched roof I will try this method!
User avatar
sberry  Germany
 
Posts: 953
Member since:
12 Mar 2010, 20:37

Previous pageNext page

Return to Work in Progress